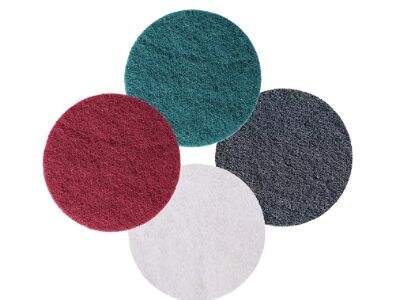
Arrazoiak erabili izan dituzu era honetan zerbait egin nahi baduzu; Barneko Arrazoa tresna baliagarri bat da, funtzionatzen da. Erlojuak eta adar handiak ondo osatuta daude barneko arrazoia erabiltzeko ondoren (zerga: pertsonak material-partizio arazoak filmaren, eguzki edo beste inoren azpian dute. Korronteak etorkizunean barruko areazare-partizio puntuan kokatzen dira (muga barruan). Ondorioz, bertako taldeak beste tresna ausgarri bat lortu dezake: automatikoen sander! Gaurko klasean, arrazoiaren eta automatikoaren arteko aldeak aldatuko ditugu, non beharrezkoa den biak erabiltzea zure proiektu argitzeko. Aimchamp zu lagunduko dizu

Arrazoa kontra Automatiko Sander
Hasi sandpaper-rekin. Sand paper-ak zorro txikiak dituen karta bat da goitik itsaten direnak. Azalera batean erabiliz, bere tekstura atzekoarekin eskualdatzen du eta gainborrak kenduak ditu. Sandpaper-aren mota desberdinak dago (grits). Grit-a zorroaren tamaina da, zein den papelean itsatsi beharrekoaren arabera. 60 edo 80) – Hona hemen gritak oso buruzkiak dira eta material asko kendu dezakete, horregatik lan askotarikoetarako ondorena dira. 320 bezala grit fina super suavea da eta zure sanding buruzkoa ondoren etorkizun finaleara hartzen dizu.
Orain arte, egiten diogu sandatzaile elektrikoak. Sandatzaile elektrikoak lanaren amaitzeko abiadura eta erraza handitu dezakete asko. Motor batek eragin agresiboa biriburutzeko erabiltzen da, eta hori diskoa edo beltak izan daiteke. Topaketako maquina txiki bat aurki ditzakezu eskua librea dutenarekin erabiltzeko edo, bestalde, tauletan montatzeko gehiago. Hauek sandpaperrak baino azkenik egiten dira, proiektuen amaitzea askoz erraztzat jotzen du. Baina, aldakuntzak diren bitartean, soilik kostuetan ere handiagoak izaten dira eta kudeatu asko zailagoak. Sandatzaile elektriko batzuk laster-markak eta atzipenak dituzte, eta horrek zureak dira, bertan bakarrik landuko duzun motako lanean arduratzera aholkuak ematen dizkizute. Adibidez, ez zenuke detail sander erabili zonak handiagoak osatzeko eta belt sanderekin ez zenuke lan txikiak egin.
Zergatik erabili sandpaperra?
Ondorioz, pentsa zenez; “zergatik sandpaperra erabili beharrezkoa den sandatzaile elektrikoak eta Arrakastako Diskoa «lasterik egin gehiago?» Esaera ona da! Laster-lasterren erabilerako osagaiak, zein dira askoz beharrezkoak. Hasieraz, laster-lasterak oso argi dira eskualde txiki eta xehetasunetan. Laster automatikoak arrisku dute horrelako eskualdeetara sartzean. Bereziki, azkenik, laster automatikoa erabiltzeko ondoren, laster motzago batekin jarraitzeari esker, gainazal bat hobeto lastera dezakezu. Hau bereizten da, zure laguntzaileak zoragarriak badira eta zerbaita bakarrik desberdintzen baduzu.
Informazioa Laster-lasteri Buruz
Zeure proiektuetarako laster-lasterak erabiltzen bazaraude edo Mahaigain-marrazkada hemen dago zurekiko gai dauden gaiak:
Aukeratu grit egokia: Metalak igarotzen ari zaren bitartean, grit egokia aukeratu nahi izango duzu. Grit txikienak argi dira pintura kendu edo gainazalaren borroka handia izateko eta, seguruenik, borrokakoa egiteko, baina grit handiak amaitzeko lanetarako soilik egokitu diren bezala (nahi izan zen benetan laburrena izatea).
Beti Itsasoa: Beti itsasoaren araberakoa izan behar duzu beltzez sandatzen denean leinketa edo materialarekin, haiek aurka baino. Horrela, ez duzu eskaintzen lagunak eta emaitza onenak lortuko dituzu.
Sandatzea: Lagundu Sandatzean, soilik eskua zahar bat erabili behar duzu sandatzean eta utzi zaitez paperak lan guztia egin. Ez jarraitu indarra asko, sandatzea lagundu dezakezu burua lerro hondetsin batekin.
Egin Dust Mask: Sandatzeak poltsa sortzen du, eta horrek ez da zoragarriak egon nahi dituenak. Lan hau egin ahala... nahikoa da! Gogoratu dust mask edo respiradorea erabiltzea.
Aukeratu Sandpaper Zuzena
Zer sand paper mugara erabili nahi duzu proiektuan? Hemen adierazpen arrunt batzuk eskainitzen dizugu.
Beltzezko sandatzea edo zaharrak bukatzeko aukeratu mugara txikiagoa (60 eta 80). Horrela, zure bidea gainetik uniforme eta sulekoak izango dira, etorkizunean handikoak bukatu bitartean.
Arriskak utzi eta azal berriaren gainean landuko den ingurunea eraikizeko, erabili 120-150 goitasa. Horrela, eskailua zailki mugan daitezke.
Azalpen azkenetan edo uzta ularrarekin soilik burutzen ari bazara, 220-320 eta gora joan. Goitasa motzagoak proiektuari bueltapen soilgailu gehiago emango dizkizute.
Konpontzea laguntzeko konpainak
Hemen dago sanding trukak batzuk, hauek ahurrez ahurrez lan handia eta denbora ahastearazten laguntzen dituzte DIY proiektuan lan egiten ari zarenean.
Ehun jarioak onartzen: beti izan Sandpaper soil edo Plat tokian. Bere efizientzia murrizten da poltsa eta argizaiak hartzen dituenean. Egiaztatu askotan eta aldatu soilik badago.
Sanding Block: Sand block edo beste padding bat erabiliz eskua hutsik mantentzen laguntzen zaio, batez ere pisua uniformoki banatzen bitartean.
Poltsa Bilaketa: Poltsak sanding egiten ari zarenean vakuma edo poltsa bilaketarako sistema erabiliz kontrollagarri mantendu daitezke. Horrela, poltsa txarra urratsak bertan mantendu eta ez duzu inoiz bereiziko arriskoa murrizten.
Ezakiak garrantzitsua da: Ez jo ezezagutik Polisha | Alditu dezakezu zure eskubideak ezaki-tasoen mailaren arabera, murrizketa #1-etik. Bestela praktika handiarentzat aukeratzen zarete, non ezaki-tasoen maila handiari eta txikiarara igaro behar duzu. Prozedura osoan kaxantsuki egiten da.

 EN
EN
 AR
AR BG
BG HR
HR CS
CS DA
DA NL
NL FI
FI FR
FR DE
DE EL
EL HI
HI IT
IT JA
JA KO
KO NO
NO PL
PL PT
PT RO
RO RU
RU ES
ES SV
SV TL
TL IW
IW ID
ID SR
SR ET
ET MT
MT TH
TH TR
TR FA
FA AF
AF MS
MS GA
GA CY
CY MK
MK EU
EU KA
KA LA
LA NE
NE